Last week I was very lucky to receive a massive bowl of cherries from The Hamper Box courtesy of one my work’s clients as a thank you and Merry Christmas.
It was massive. I’m starting to think several kilograms worth of cherries. And we got sent three of them.

So what do you do when you are inundated with fruit that really needs to be used?
Well, first you eat some. (Of course.)
Then you share some around. (Man Piece took off to work with a plastic bag full of cherries for his colleagues, which barely made a dent in the bowl and which he mostly ate.)
And then when you really want to use some of them up, you bake with them.
Thus the idea to make cherry cheese danishes came to mind.
I was originally going to make a cherry pie, but then… well… I couldn’t be bothered. It seemed like so much work!
But these cherry cheese danishes were so easy, and I really think they would be easy to do with a variety of different fruits.
What you will need (makes 16):
3 to 4 cups of cherries (or your fruit of choice. I would be keen to try this again with raspberries or strawberries.)
250g cream cheese
2 Tbsp sugar
1 tsp vanilla essence
4 sheets puff pastry
1 egg and 1 Tbsp water for the egg wash to brush over

Pictured here is raw sugar, but that is only because I didn’t realise we had no white sugar in the apartment. It worked well, but you could probably use whatever sugar you prefer.
Directions
First I needed to take the stalks off all the cherries and remove the pips. It would have been a whole heap easier if I had one of those fancy cherry de-pippers. Alas, I was left with a knife and my fingers to cut them open and pull the pips out. Messy work.
Mix the cream cheese, sugar and vanilla essence in a bowl until combined.
Cut each pastry sheet in four — waiting for it to thaw fully makes this a whole lot easier.
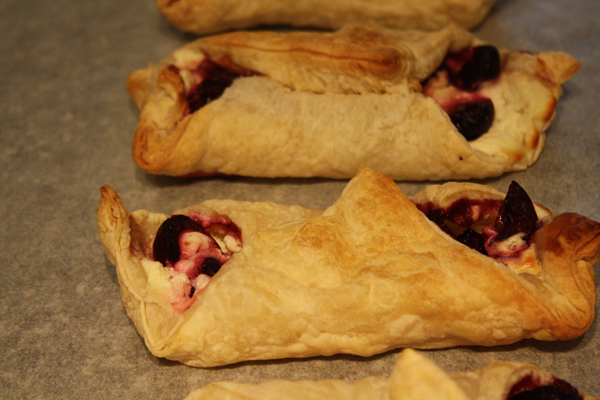
Spread cream cheese mixture over pastry square and add cherries. Put a few more on than pictured – I think I ended up putting about eight halves on each pastry square.

You could really do this in any orientation you like, be it diagonally or just in a dollop in the centre. It’s really up to how you want to fold up the pastry.
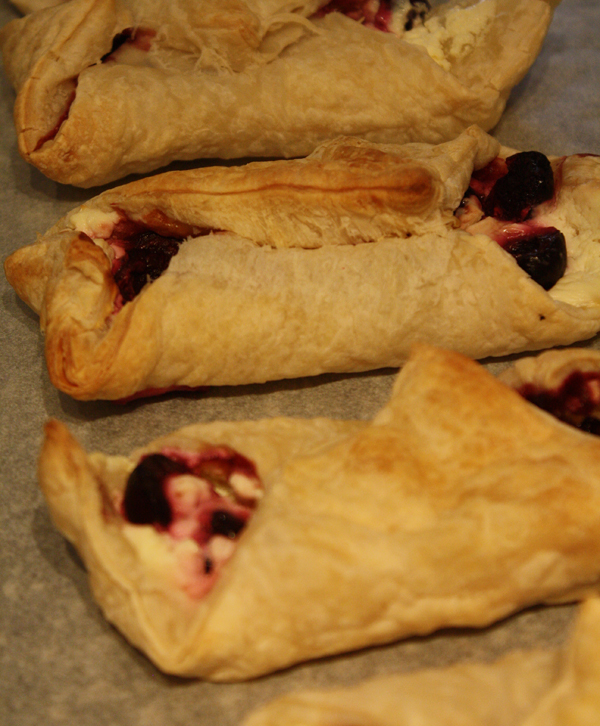
I did a mixture of both, but I made sure that there were vents from the centre to let any steam out. I found the best way to fold over a long corner, fold the other long corner on top of that and then tuck the small corners in, squeezing the pastry together.
Place on a baking tray lined with baking paper. Brush with egg wash. (I didn’t actually do this as I don’t have one of those cooking brushes right now. The pastries were fine without it, but it would give them a bit of a nicer look.)
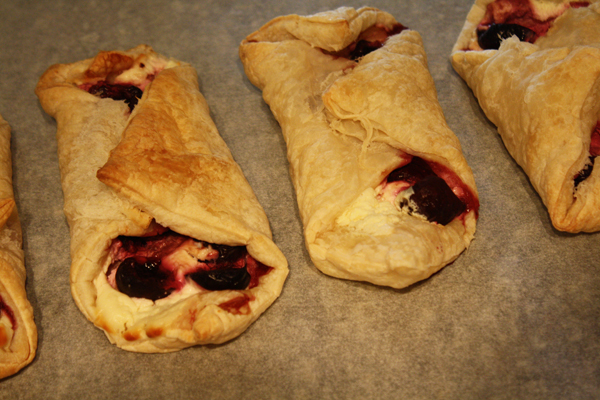
Bake in oven set to 200°C for around 15 minutes or until golden brown.


Serve fresh. They do last a few days in the fridge – if they make it that long. Be warned, they are very more-ish!